Learn how to measure a hydraulic filter element correctly, including height, outside and inside diameter, end caps, threads, seals and flow direction.
A hydraulic filter replacement often begins with a part number. When the number is clear, selection may look straightforward. When the label is missing, damaged or different from the documentation, dimensions become the next reliable reference point.
However, a filter element should not be selected from one measurement alone. Height, outside diameter, inside diameter, end-cap design, thread, seal and flow direction work together. One incorrect dimension can prevent installation, create a bypass path or reduce equipment protection.
This guide explains how to measure a hydraulic filter element before ordering. For available replacement options, start with the AIDA product catalog.
Why accurate measurement matters
Hydraulic filter housings are designed around a specific element envelope. The replacement must fit the housing, seal correctly and allow fluid to pass through the intended filtration path.
An element may look similar from the outside but differ in:
- Overall height
- Outside diameter
- Inside diameter
- End-cap shape
- Thread or connection design
- Seal dimensions
- Flow direction
- Bypass or support arrangement
Measuring the old element before discarding it is therefore an important maintenance step.
Tools and preparation
Use suitable measuring tools whenever possible:
- Digital or vernier calipers
- A steel ruler for approximate checks
- A clean work surface
- A marker and label for recording values
- A camera for reference photographs
Before measuring, remove loose contamination and allow the element to drain. Do not attempt to straighten a distorted element and then treat the result as accurate. If the element has collapsed or been crushed, record that condition and inspect the housing.
1. Measure the overall height
Place the element upright on a flat surface. Measure from the lowest seating point to the highest point, including the end caps.
Take measurements at several positions around the element. A single reading may be affected by a damaged end cap or a non-square seating surface.
Record whether the height includes:
- End caps
- Gaskets
- Springs
- Projecting connections
If measurement points are unclear, record the method alongside the value and include photographs.
2. Measure the outside diameter
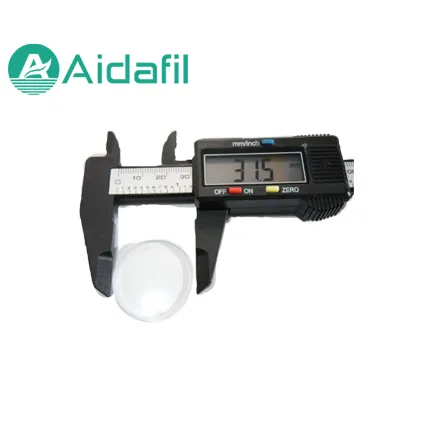
Measure across the widest solid part of the filter element. Do not measure only the pleat tips if the end caps or outer support structure are larger.
For a circular element, take at least two readings at right angles to check roundness.
Where an element has stepped diameters, record each relevant diameter separately:
- Main body diameter
- End-cap diameter
- Smallest outer diameter
- Sealing diameter
3. Measure the inside diameter
The inside diameter is not always the same as the diameter of the center tube. Measure the opening that actually locates or seals on the housing.
Record:
- Inside diameter at both ends
- Center-tube inside diameter
- Seal or gasket inside diameter
- Any reduction caused by an end cap
A caliper should be held square to the opening. Measuring at an angle will produce an incorrect reading.
4. Record the end-cap configuration
Two elements can have the same height and diameter but different end caps.
Record the number and type of openings at each end:
- One open end and one closed end
- Both ends open
- Threaded opening
- Bayonet or special locking design
- Metal or plastic end caps
- Gasket groove or raised sealing surface
Photograph both ends separately. A top-view photograph can be especially useful for confirming the opening arrangement.
5. Confirm threads and connections
If the element has a threaded connection, record the thread type and size where possible. Do not estimate threads from the outside diameter alone.
Check:
- Thread diameter
- Thread pitch
- Male or female thread
- Thread length
- Straight or tapered thread
- Connection orientation
Where thread gauges are unavailable, take close-up photographs and record the equipment model and part number for verification.
6. Measure the seal or O-ring
The seal is part of the filter’s function, not an accessory. A replacement element should use a seal with the correct dimensions and material.
Measure:
- Inside diameter
- Outside diameter
- Cross-section thickness
- Groove width and depth where accessible
Record the existing seal material if known. Fluid type and operating temperature should be checked before selecting NBR, FKM or another elastomer.
7. Identify flow direction
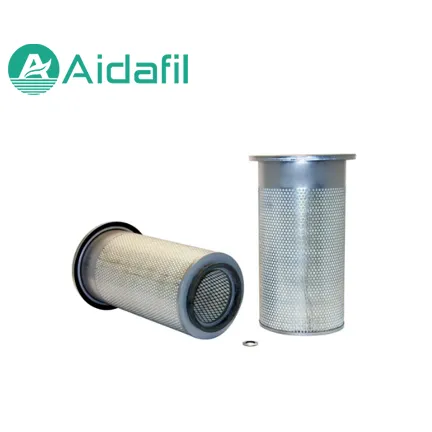
Flow direction may be outside-to-inside or inside-to-outside, depending on the housing and element design.
Look for:
- Arrows on the original element
- Housing markings
- Differences in the outer and inner support structure
- Seal positions
- Bypass arrangement
Installing an element in the wrong direction may reduce efficiency, damage the media or allow contamination to bypass the intended filtration path.
A practical measurement record
| Measurement | What to record |
|---|---|
| Overall height | Value and whether end caps or seals are included |
| Outside diameter | Main body, end cap and sealing diameters |
| Inside diameter | Opening and center-tube dimensions |
| End caps | Open, closed, threaded and sealing configuration |
| Thread | Type, size, pitch and orientation |
| Seal | Dimensions and material if known |
| Flow direction | Arrows, support structure and installation position |
Common measurement mistakes
Measuring only the outside diameter
A similar outside diameter does not confirm fit. The inside diameter, end caps and seal often determine whether the element seats correctly.
Using a deformed element as the reference
A crushed or swollen element will produce incorrect dimensions. Where possible, compare with the housing and original documentation.
Mixing millimeters and inches
Record the unit beside every value. If conversion is required, retain the original measurement as well.
Ignoring the housing
Inspect the housing for missing springs, damaged sealing surfaces, incorrect O-rings and bypass components. A correct element can still fail if the housing is damaged.
Confirm the fit before installation
Before closing the housing, check that the element:
- Seats fully without force
- Uses the correct seal
- Allows the housing to close correctly
- Is installed in the correct flow direction
- Does not interfere with springs or bypass parts
- Matches the required filtration rating and fluid compatibility
Do not force an element into position. If it does not seat correctly, stop and verify the dimensions and end configuration.
When to request technical support
Contact a filtration specialist when:
- The original part number is missing
- The element is damaged or deformed
- The housing has been modified
- The system operates at high pressure or temperature
- The fluid or seal material is uncertain
- Only one approximate measurement is available
For hydraulic systems, review the hydraulic filter elements range and compare the available dimensions, connection details and filtration ratings.
Frequently asked questions
What tools are needed to measure a hydraulic filter element?
Use calipers for the main dimensions, a steel ruler for approximate checks, and a camera to document end caps, seals and markings.
Should the height include the end caps and gasket?
Record the overall height as installed and state whether end caps, gaskets or projecting parts are included. This prevents different measurement methods from being compared incorrectly.
Can two filters with the same dimensions be interchanged?
Not necessarily. Filtration rating, media, seals, pressure rating, bypass design and flow direction may still differ.
What should be photographed with the measurements?
Photograph the part number, both ends, the seal, the full element and any housing markings. Include a scale in the photographs where possible.
For additional guidance on compatibility and ordering, review the filter selection FAQ.
Final checklist
- Record the original part number.
- Measure overall height, outside diameter and inside diameter.
- Photograph both end caps.
- Confirm threads, connections and seal dimensions.
- Check flow direction and housing components.
- Confirm filtration rating, media and fluid compatibility.
- Keep the measurements with the maintenance record.
Accurate measurement reduces the risk of ordering a filter that looks correct but does not fit or perform properly.
Need help reviewing a replacement? Contact our technical team with the part number, measurements, photographs and operating conditions.